Streaming from Rivendell
From Rivendell Wiki
Contents
[hide]Using PyPAD to Generate PAD Updates
Beginning with v3.0.1, Rivendell uses a system called 'PyPAD' to generate program associated data ("PAD", sometimes also referred to in the Rivendell docs as "Now & Next") updates in real time. Each time a log event starts or stops in RDAirplay, PyPAD can be configured to call one or more Python scripts, each of which are handed the parameters of the event to be be processed and/or forwarded by the code in the script. An overview of the system can be found in the Program Associated Data chapter in the Rivendell Operations Guide.
While PyPAD is explicitly designed to make it relatively easy for even novice Python coders to create their own custom scripts, Rivendell also ships with a set of pre-installed scripts that can deal with many common update scenarios, including sending updates for:
- RDS/RDBS displays
- Online streaming encoders/players
- Station web sites
- Associated data displays (such as the Text Display Widget in WallTime
Icecast2 Meta Data from Rivendell
Rivendell ships with a PyPAD script called pypad_icecast2.py that can be used to update the 'Currently playing' display in IceCast v2.x setups. To configure it, proceed as follows:
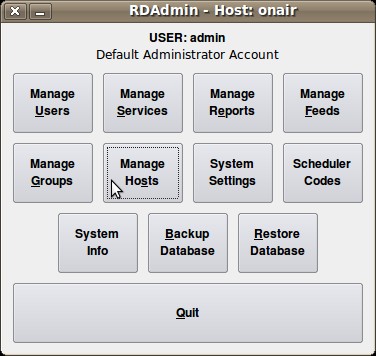
- Start RDAdmin and go to Manage Hosts => <hostname> => PyPAD Instances.
- Touch the 'Add' button to open a list of available PyPAD scripts.
- Choose pypad_icecast2.py from the list and then touch 'Open'. An 'Edit PyPAD Instance' dialog will open.
- Find the 'Password=', 'Hostname=', 'Tcpport=' and 'Mountpoint=' entries in the configuration and change them to the values appropriate for your Icecast server. (The configuration contains other entries that can also be used to customize the behavior of the updating process, such as limiting the ability to send PAD updates to a specific subset of carts on the basis of group membership. See the accompanying comments in the configuration for details).
- Touch the 'OK' button.
- A new line will appear in the 'PyPAD Instances' dialog. The status light at the start of the line should turn green after a few seconds. If it remains red, select the entry on the list and then touch the 'Error Log' button to see any error messages or warnings generated by the script. Close the dialog, then touch the 'Edit' button and make any needed changes to the configuration. Repeat the process until a green status light is obtained.
N.B. - Due to the way that the IceCast server software is designed, PAD update messages must be seen by the server to originate from the same IP address as that being used to originate the associated audio stream. Provided that the audio encoder and Rivendell are accessing Icecast by means of the same NAT'ed firewall, this requirement will generally be met. If not, then PyPAD can often be configured to send PAD via the audio encoder.
Probably outdated Information
THIS IS PROBABLY OUTDATED
Rivendell can be setup to use to jack for audio output. Jack handles connections to ALSA. Hook up the Rivendell outputs to the jack inputs. Jack encodes the stream and sends to your stream source which then feeds your stream server.
Setup Rivendell to Use Jack
Setup Rivendell to use jack in the Rivendell configuration file /etc/rd.conf
FIXME: MORE DETAILS NEEDED ON RIVENDELL JACK SETUP.
possible way of working:
When compiling Rivendell from source, include jack support by installing jack prior to ./configure. Then - after installation - first fire up jack using qjackctl and then start the rd services. You will find a jack "soundcard" in rdadmin.
Configure Jack
You can setup Jack (jackd) in a number of ways. There are packages that will start jack at each bootup (FIXME: NEED DETAILS AND SETUP FOR PACKAGES) or you can use the package qjackctl also called Jack Control to setup and use jack. Jack Control provides a GUI interface for configuring Jack. (FIXME: NEED DETAILS AND SETUP FOR JACK CONTROL).
Install a stream source
Install edcast-jack on your machine.
Download and uncompress the source archive file. Then open a terminal and go to the edcast-jack-3.1.7 (May be a different folder name if the version increases) directory and compile it.
The normal ./configure , make and then run as super user make install worked for me. However, since there is no list of the dependencies I had to run ./configure a number of times watching for the missing files till I got them all installed. Then do make and after that as the super user make install to be up and running. Type edcast-jack in a console window and it will tell you how to invoke it on the command line.
On Ubuntu Jaunty 9.04 the following packages had to be installed to have full edcast-jack functionality: (Mark additional required changes as well!)
libfaac-dev
libfaac0
libjack-dev
libflac-dev
libogg-dev
libvorbis-dev
libmad0-dev
libmp3lame-dev
g++
edcast-jack Readme
edcast-jack Readme
-------------------

This version of edcast allows you to hook into any jack output port
and broadcast the audio to an icecast or shoutcast server.

This version of edcast is all command-line oriented, and comes with
example config files for each of the encoding types supported (Ogg Vorbis,
LAME, AAC).  You will most likely need to take one of the example configs
(in the conf dir) and modify it to suit your needs.

Here is an example of how to use it with jack (http://jackit.sourceforge.net).

Step 1:
 * startup jackd

Step 2:
 * Feed a signal into jackd.  There are many applications you can use
   for this, if you like XMMS, try installing http://xmms-jack.sourceforge.net/

Step 3:
 * Start edcast specifying the appropriate output ports.  To get a list of
   the output ports, use jack_lsp.  If you use XMMS, you'll see something like :

    % jack_lsp
    alsa_pcm:capture_1
    alsa_pcm:capture_2
    alsa_pcm:playback_1
    alsa_pcm:playback_2
    bio2jack_0_32083:out_0
    bio2jack_0_32083:out_1

   In this case, the bio2jack_0_32083:out_0 and bio2jack_0_32083:out_1 are the
   output ports from XMMS.  So you'd start edcast like :

    edcast -c edcast_OggVorbis.cfg bio2jack_0_32083:out_0 bio2jack_0_32083:out_1

   Use edcast -h for a usage.
edcast-jack Usage
usage: edcast -c configfile [ -n jack_client_name ] [ -p portmatch ] [ jackport1 [ jackport2 ... ]]
Where:
-c : config file that specified encoding settings
-n : name used to register with jackd
-p : if specified, edcast will connect to the first two output ports matching this name.
jackportX : explicitly specify a jack port name
edcast-jack Sample Configuration File
# Destination server details (to where you are encoding).  Valid server types : Shoutcast, Icecast, Icecast2
ServerType=Icecast2
Server=192.168.1.100
Port=8000
ServerPassword=hackme
ServerMountpoint=/stream
# YP (Stream Directory) Settings
ServerPublic=1
ServerIRC=
ServerAIM=
ServerICQ=
ServerStreamURL=http://www.oddsock.org
ServerName=This is my server name
ServerDescription=This is my server description
ServerGenre=Rock
AutomaticReconnectSecs=10
AutoConnect=0
# Output codec selection (Valid selections : MP3, OggVorbis, Ogg FLAC, AAC, AAC Plus)
Encode=MP3
# General settings (non-codec related).  Note : NumberChannels = 1 for MONO, 2 for STEREO
BitrateNominal=48
BitrateMin=128
BitrateMax=128
NumberChannels=1
Samplerate=22050
# Ogg Vorbis specific settings.  Note: Valid settings for BitrateQuality flag are (Quality, Bitrate Management)
OggQuality=0
OggBitrateQualityFlag=Quality
# LAME specific settings.  Note: Setting the low/highpass freq to 0 will disable them.
LameCBRFlag=1
LameQuality=1
LameCopywrite=0
LameOriginal=0
LameStrictISO=0
LameDisableReservior=0
LameVBRMode=vbr_abr
LameLowpassfreq=0
LameHighpassfreq=0
LAMEPreset=0
# AAC (FAAC) specific settings.
AACQuality=100
AACCutoff=
# Log Level 1 = LOG_ERROR, 2 = LOG_ERROR+LOG_WARNING, 3 = LOG_ERROR+LOG_WARNING+LOG_DEBUG
LogLevel=3
# Log File
LogFile=streamTranscoder_1
Install a broadcast server
You can select one of these broadcast servers. It will receive the encoded stream from the source stream and provide it to the public listeners.
You can choose classic broadcast servers (like Icecast2) or peer-to-peer broadcast solutions (like PeerCast or FreeCast).
PeerCast
Install PeerCast. Current version (as of May 18/2005) is PeerCast v0.1211
- PeerCast web site
- Create A PeerCast User
- PeerCast linux install guide.]
- I suggest you copy the html directory from the peercast archive to /home/peercast.
- I suggest you copy the peercast executable from the peercast archive to /usr/bin.
- See below for configuration instructions/suggestions.
Configure
FreeCast
Install the FreeCast debian package available on the Tryphon Debian Archiver.
IceCast
Install the IceCast streaming server using the instructions and source code found at IceCast.
Streamp2p
Streamerp2p enables anyone to webcast without expensive servers. Works from your home pc, even on dial-up for some streams. No max limit to listeners like shoutcast. No 'server full' messages, no stream hosting costs, completely free to use for both personal and commercial users. Tiny install (430k), ActiveX version for web pages, and soon a Java version for web and mobile devices.
Streamp2p is a Windows but runs without problem under wine on Ubuntu Linux.
Icecast2/Shoutcast Meta Data from Rivendell
Streamdata
Streamdata for Shoutcast is available from EMITworks. You can download it here.
Streamdata for Icecast2 is available for download here .
Streamdata is a set of scripts to update Shoutcast and Icecast2 using Rivendell Now&Next data.
- Streamdata was written by Michael Papsdorf
- Modified for usage in Debian/Ubuntu and Icecast2 by Daniel Roviriego
HowTo stream Rivendell Now & Next data to your Shoutcast server:
- Preparation: make sure you have netcat, lynx and awk installed on your system under openSUSE, simply type "zypper install netcat" in a console. Same with Lynx and awk
- Extract the directory somewhere you will find it ;)
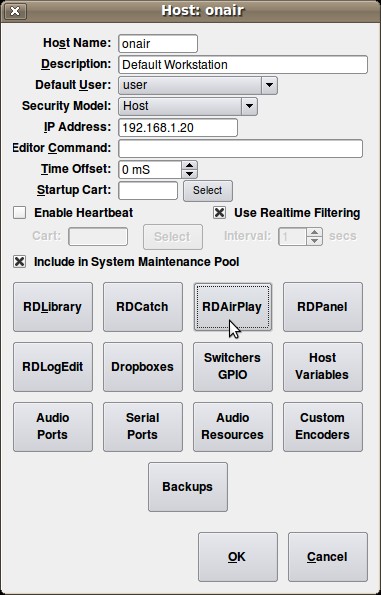
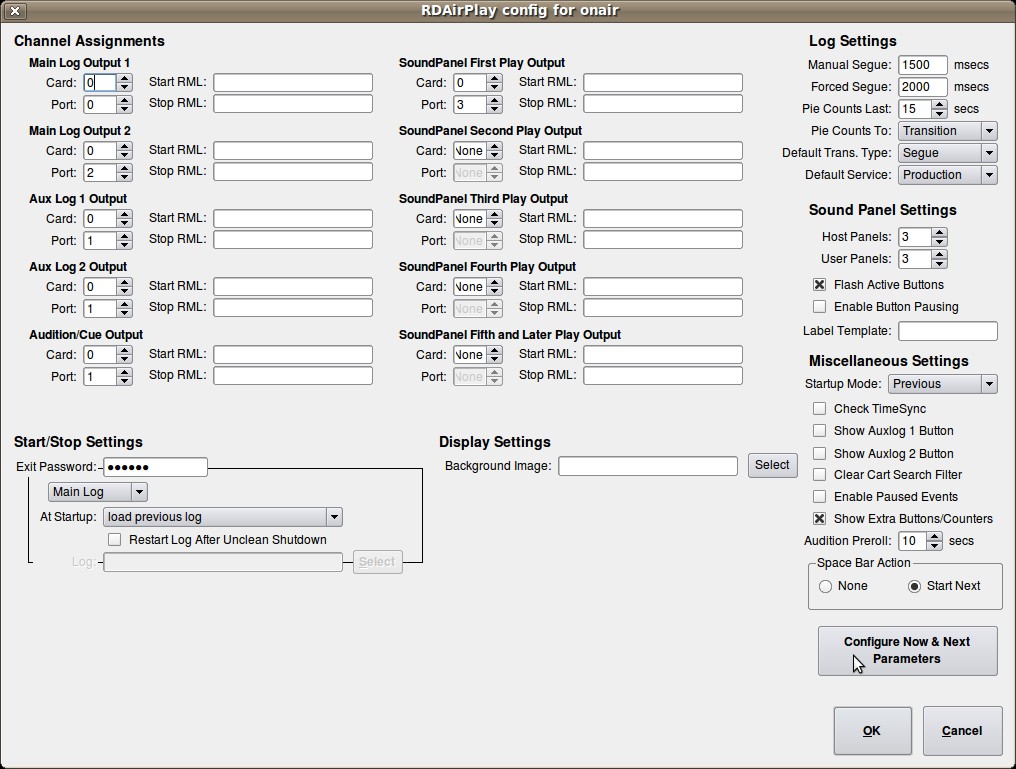
- In rdadmin, go to manage hosts --> your host --> rdairplay --> configure Now & Next
- IP-Adress: this is 127.0.0.1 since you are running the script on the same machine
- UDP Port: anything that is unused, we use 6666
- UDP String: This is the data you actually send. To output the now playing artist and title enter:
%a %t#
Note: You must include a # at the end of the UDP string so that the updater can tell where one title starts and the other ends.
The following placeholder macros can be used in the UDP String, which will be replaced appropriately when a packet is sent:
%n - The currently-playing CART NUMBER
%g - The currently-playing GROUP NAME
%t - The currently-playing TITLE field
%a - The currently-playing ARTIST field
%l - The currently-playing ALBUM field
%y - The currently-playing YEAR field
%b - The currently-playing LABEL field
%c - The currently-playing CLIENT field
%e - The currently-playing AGENCY field
%u - The currently-playing USER DEFINED field
%h - The length of the currently playing cut, in mS.
%r - A "Unix" style newline (naked ASCII 10)
%R - An "MS-DOS" style newsline (ASCII 13/10)
%% - A literal '%'.
NOTE: Additionally, with the exception of the '%r', '%R' and '%%' placeholders, the corresponding field for the next-to-play event can be specified by simply uppercasing the above placeholders. Any other characters will be sent unchanged.
Remember to put a # at the end of the UDP String, so the updater can keep the different titles apart.
- RML: Additional RML to execute. To put the update that was sent into the message field in rdairplay, this should read LB updated %a %t! (the ! is mandatory)
- cd into /streamdata
- Edit the configuration in song.sh and streamupdate.sh
- In song.sh port set in rdadmin and songdat the path where you extracted the directory to including the directory and song.dat. Example: you put it into /home/rd, than it should read "/home/rd/streamdata/song.dat"
- In streamupdate.sh: edit the domain name or ip of your shoutcast server, the port it is on, the adminpassword (in case you didn't set one, this is the password you use to stream), a message for when it is started and, once again, the path to song.dat
NOTE: The issue has been fixed. If you downloaded streamdata before 27th of September 2010, the following still applies: In the current release streamupdate.sh has a hardcoded value in place of a variable. You can fix this by changing
($(nohup lynx -source "http://dd-radio.com:8000/admin.cgi?pass=$pass&mode=updinfo&song=$title" > /dev/null &))&
to
($(nohup lynx -source "http://$server:$port/admin.cgi?pass=$pass&mode=updinfo&song=$title" > /dev/null &))&
- Restart rdairplay so that the changes in now&next take place
- execute startupdate.sh by typing ./startupdate.sh
NOTE: The meta data for all songs are written to song.dat. ALL of them. Make sure that song.dat is not getting too big. To reset the file, simply "rm song.dat" and "touch song.dat"
How to stream Rivendell Now & Next data to your Icecast2 server:
The same instructions as above (for the Shoutcast Server), apart from:
- There is no need for lynx and awk (wget and tail instead, available natively in Debian and Ubuntu)
- UDP String: - The same as above, but for getting the titles and Artists to different lines into the "song.dat", Use a wildcard for a newline %r. That would be: %a - %t %r
NOTE: If you are using Ubuntu 10.04, due to changes in the netcat of this version, you'll have to change the options passed to "nc" in the "song.sh" file. Change
netcat -l -u -p $port > $songdat &
to
netcat -k -u -l $port > $songdat &
icecast.py
Icecast Stream python meta-data Updater Courtesy WZEW-FM MOBILE AL and Nik Martin - Server Corps
Updating metadata IceCast2/Shoutcast with Rivendell - RDSTREAMDATA
Portuguese to English translation
Following these steps can we use the information in "Now & Next" to update the Rivendell icecast2 servers and / or Shoutcast, thereby making the names of the artist and song are running are displayed in the player receiving the stream.
The Rivendell sends this information via UDP messages, what we do is to capture these messages (using netcat), treat them and apply them to the desired shape Shoutcast/Icecast2 streaming services.
Requirements
The procedures shown here were tested at 10.4 32 bit Ubuntu distribution. Make sure your distribution has the following packages installed:
- Wget (Used to upgrade servers icecast2)
- Lynx (Used to upgrade servers Shoutcast)
- Nc (netcat, used to capture messages sent by RDAirPlay)
The commands used in the scripts provided below will work with NC (netcat) openbsd version which is the default for Ubuntu 10.04. If your distribution uses the traditional NC default, see if there is a binary version of openbsd, as Ubuntu, for example, has both versions. In Ubuntu you can check the versions available with the command:
# Update-alternatives - list nc
It is not necessary that you change the default version of your system, just set in the following steps to use the version RDStreamData openbsd.
Installation
- Download the package rdstreamdata.tar.gz
- Unzip the package and enter the directory created
# Tar-zxvf rdstreamdata.tar.gz
# Cd rdstreamdata
- As root, run the installation script and read the instructions on screen.
#. / Install.sh
Will this script install RDstreamdata, a set of scripts That Will listen to an UDP port is Rivendell Now & Next information and update
this information to an icecast2 and / or ShoutCast Server.
Do you want to do it? y / n.y
- Enter "y" and hit Enter
Copying files
Now You Have to edit / etc / rdstreamdata.conf 'to suit your icecast2, Rivendell and ShoutCast Configurations.

Attemper That You Must Set the username and group Which must run under the process before you start the daemon for the first time.
Edit / etc / default / rdstreamdata 'and set' Enable 'to' true ', so You Can start it though the init script

Also you need to Set the script / etc / init.d / rdstreamdata 'to Be automaticaly run in the desired runlevels,
systems in Ubuntu You may use "sysv-rc-conf 'command for this.


You Can contact me at contato@fdts.com.br

Thanks for using
General Settings
- Now we must set up some items, as described by the installer, start with the'/ etc / defaults / rdstreamdata, where we must fulfill what the user under which the processes are executed. You can use either the user that you log into Linux as the user running the other services of Rivendell, I use the usernamerduser andgroup 'rivendell. NOT recommend that you use root or another user with higher privileges.
- Even in/ etc / defaults / rdstreamdata set the value ofENABLE totrue, otherwise the daemon will not start.
- In the file/ etc / rdstreamdata.conf we have all other settings, we should look to the following:
- In the general settings:
- Netcat_bin = / bin / nc - At this point we can define a binary alternative to netcat, remember that we emphasize the importance of early use Netcat version of OpenBSD. As with Ubuntu 4.10 this is already the default, I'm using the default path / bin / nc.
- Riv_udp_port = "9876" - Here we define which port our script will be listening for messages from Rivendell, you should use a port that is not being used by any service above 1024 and ever since we are not running as root. The port is also used here as defined in the configuration of Rivendell.
- Message = "Name of your radio" - The message specified here is used when the RDAirPlay is closed or when the event is in the air that is not configured to send names (jingles, commercials, called , etc.).
- Min_title_size = 5 - Minimum size of characters that the event must have for the the standard message set in the previous section is replaced by the name of the event. This is used to filter unwanted events of null characters.
- In the general settings:
Settings Icecast2
- In the file/ etc / rdstreamdata.conf
- These settings define whether or not you use a server Icecast2 and what data to access it.
- Ic_enable = true - If the value is different fromtrue the server Icecast2 not be updated.
- Ic_server = "localhost" - Hostname or IP of server Icecast2, change as needed.
- Ic_admin = "admin" - User Icecast2 server administrator, change as needed.
- Ic_pass = "password" - User password server administrator Icecast2, change as needed.
- Ic_port = "8888" - Server port Icecast2, change as needed.
- Ic_mount = "/ radio" - Mount point Icecast2 server, change as needed.
- These settings define whether or not you use a server Icecast2 and what data to access it.
Settings Shoucast
- In the file/ etc / rdstreamdata.conf
- These settings define whether or not you use a Shoutcast server and what data to access it.
- Sc_enable = true - If the value is different fromtrue the Shoutcast server will not be updated.
- Sc_server = "localhost" - Hostname or IP of the Shoutcast server, change as needed.
- Sc_admin = "admin" - User Shoutcast server administrator, change as needed.
- Sc_pass = "password" - Password for user administrator Shoutcast server, change as needed.
- Sc_port = "8080" - Shoutcast server port, change as needed.
- These settings define whether or not you use a Shoutcast server and what data to access it.
Configuring Rivendell
This is an essential step for the update to run, since the Rivendell not send the desired information is useless effort. To enable the transmission of information follow the following steps:
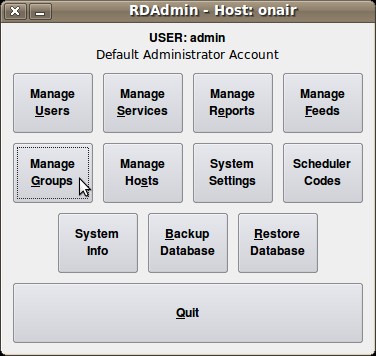
- Enter rdadmin.
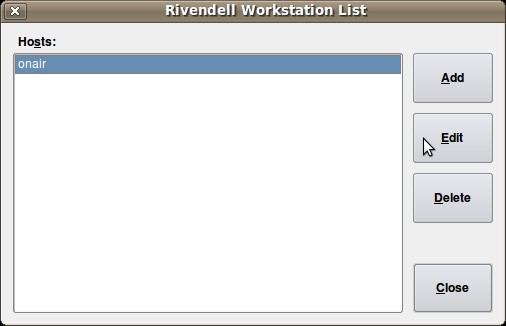
- Click onManage Hosts.
- Select the Host which runs RDAirPlay and clickEdit.
- ClickRDAirPlay
- On the screen that opens clickNow & Next Set Parameters.
- Fill in the fields as indicated:
- IP Address 127.0.0.1
- UDP Port: 9876 - The same setup informed/ etc / rdstreamdata.conf.
- UDP String:% a -% t% r - Thus we have a message with the names of the artist and the current song, plus a line break.
At this point the RDAirPlay is ready to send UDP messages to update our Streaming, however we must be sure that groups are configured to transmit the event information.
- Free rdadmin again.
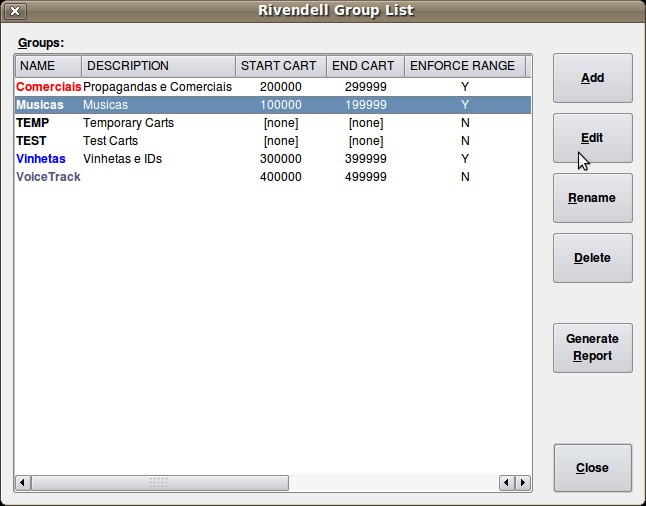
- ClickGroups.
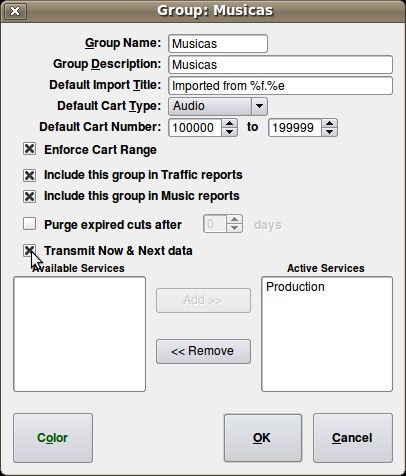
- Select a group that wants to transmit information and clickEdit.
- Check theTransmit Now & Next day and click OK.
- Repeat the last steps for all desired groups.
- Close and reopen the RDAirPlay. Now the Rivendell should already be updating your streaming server!
Happy Rivendelling!
You can follow any updates to the log file/ var / log / rdstreamdata.log
Further Rivendell Streaming Info
You can also see the page Stream under Debian for information about streaming under Rivendell but it references darkice and ices-kh(ices2). The first if compiled does not work and the latter is hard to find if you even can.
Also see Rivendell Loadable Modules for more info on meta data transfer to external systems
