Difference between revisions of "Aman Debian Wheezy Install"
From Rivendell Wiki
(Created page with "'''What is Aman?''' Aman is used as a server monitoring tool for the Rivendell database and the /var/snd Audio directory. The idea being you can use this tool to automate sw...") |
(No difference)
|
Latest revision as of 15:37, 13 March 2018
What is Aman?
Aman is used as a server monitoring tool for the Rivendell database and the /var/snd Audio directory. The idea being you can use this tool to automate swapping between master and slave server as opposed to manually configuring your own rsync and MySQL replication scripts.
If you just want to use Rivendell stand alone or on a single server then you don't need to know about aman however if you would like to have a server you can use in case of a failure keep reading.
This guide walks through installing Aman from source for Debian Wheezy on a bare bones install (no GUI for the most part). The guide assumes you're comfortable with the command line although feel free to substitute all talk of editing config files via nano with your editor (graphical or otherwise) of choice.
All of this information is extrapolated from the INSTALL file that you can download with aman from github. Special thanks to Thomas Golding on the Riv mailing list for the mysql vs mysqld detective work.
Getting down to the nuts and bolts...
You will need:
- 2 Servers
- A static IP you can use for each public address (static on your network, not the Internet)
- Each server needs 2 network cards
- A Crossover cable
- Debian 7 mini live iso (burned to CD or converted to a USB pen)
NB: These servers work in virtualisation really well as it is only a file store with a MySQL database but you'll need to test for production use if you're doing anything fancy.
NB2: I'm not going to talk through the normal Rivendell installation process or exporting NFS shares etc as this should be something you've done before (and there are plenty of other guides covering that).
NB3: Aman makes a lot of assumptions that it can run as root and requires root access via ssh. I tried making a sudo user but things just didn't work properly. Just make sure your root password is good and even better make these machines independent from the rest of your network.
Getting all the pre-requisites installed
After the usual Debian install login as your freshly minted root user and lets get going. Anything prefixed with # will be the root shell from here on in.
# apt-get update
- Install MySQL:
# apt-get install mysql-server
NB: Make a note of your root MySQL password
- Install perl modules that aman requires:
# apt-get install libterm-readkey-perl libclass-dbi-mysql-perl
- Install QT4, the QT4 MySQL driver and other build tools:
# apt-get install qt4-dev-tools libqt4-sql-mysql build-essential libtool autoconf automake usermode
- Install NTP to keep the server time in sync (if you have an internal NTP server remember to point this server to that rather than using debian ntp mirror bandwidth):
# apt-get install ntp
- Install git for getting the source code:
# apt-get install git
- Install xinetd which is used to spawn rsync as required by aman:
# apt-get install xinetd
Getting and compiling the source code
With all that out of the way we can actually compile and install aman
# cd ~
# git clone https://github.com/ElvishArtisan/aman
# cd aman
Create the configure scripts etc:
# ./autogen.sh
If there are any errors here then it usually relates to missing pre-requisites. Google the errors and you should be able to figure out what packages you are missing.
Now we need to tell the compiler where QT4 lives on Debian so that you won't get errors about missing QT.
# export CPPFLAGS=-I/usr/include/qt4
And before we install we need to create a few missing directories that aman requires:
# mkdir -p /etc/security/console.apps/
# mkdir -p /var/aman/snapshots/
Finally we can configure, compile and then install the tool:
# ./configure
# make
# make install
Make usually takes about 30 seconds on any relatively modern machine. Its a lot quicker than the Rivendell compile time if you've ever done that in a past life.
Correcting Debian idiosyncrasies
Debian uses dash as a sh substitute which makes the amand service fail to start. It also calls the MySQL service msyql as opposed to mysqld which aman assumes. So lets fix that:
# dpkg-reconfigure dash
Answer no when it asks to use dash as the default shell for sh. This defaults sh to bash which works fine.
# ln -s /etc/init.d/mysql /etc/init.d/mysqld
That takes care of the start up scripts so lets move on.
Creating SSH keys for passwordless login
Aman makes use of ssh for rsyncing and possibly other things so we need to create some ssh keys so that root is not prompted for a password between the two servers.
# ssh-keygen
Hit enter on all the options to create a key with no password. Now copy this key to your secondary server:
# ssh-copy-id root@other_server
# For example on my server (main is 192.168.1.21 and secondary is 192.168.1.22):
# ssh-copy-id root@192.168.1.22
Make sure you test this on both the public and private addresses e.g. :
# ssh root@other_server_public_address
# ssh root@other_server_private_address
You should not be asked for a password when you login like this.
NB: If you haven't set up your network as static yet, just edit /etc/network/interfaces and set up both eth0 (public) and eth1 (private via crossover cable) then repeat the ssh-copy-id steps
Amending the aman config file
# cp ~/aman/conf/aman.conf.sample /etc/aman.conf
# nano /etc/aman.conf
Change the alertaddress and fromaddress as required. After this all you need to do is change the names and passwords in the [SystemA] and [SystemB] so that they match your setup. For example:
[SystemA]
Hostname=mainserver
MysqlUsername=repl
MysqlPassword=letmein
PublicAddress=192.168.1.21
PrivateAddress=192.168.10.21
Finally we need to change where the ssh keys are located so change that line to:
SecureShellIdentity=/root/.ssh/id_rsa
Obviously do the same in the SystemB section but change the IP addresses.
With that done we can copy this file to the secondary server:
# scp /etc/aman.conf root@secondary_server:/etc/aman.conf
Amending the MySQL config
Aman has a sample MySQL config that tunes a lot of variables that probably make MySQL faster for Rivendell use. To be honest I think you could leave these as the defaults but lets do it anyway.
We'll make a new file under /etc/mysql/conf.d/ so that our user changes will never be overwritten by Debian updates in the future. If you look in ~/aman/conf/my.cnf-SystemA-sample you'll see all the Riv options, I'm only changing the values that are different to the defaults.
Note I didn't use the log-error directive as it causes issues with the flush logs command under Debian.
# nano /etc/mysql/conf.d/rivendell.cnf
[mysqld]

#network
bind-address=0.0.0.0
#tuning
max_connections=250
key_buffer_size=128M #Do not use more than 25% system memory here
max_allowed_packet=1M
table_open_cache=512
read_buffer_size=2M
read_rnd_buffer_size=8M
myisam_sort_buffer_size=64M
query_cache_size=32M
#replication
server-id=1
log-bin=mysql-binA
binlog-do-db=Rivendell
log_slave_udpates
For more information on all of these options check out the MySQL manual http://dev.mysql.com/doc/refman/5.5/en/server-system-variables.html
Now copy this to the secondary server and edit it:
# scp /etc/mysql/conf.d/rivendell.cnf root@192.168.1.22:/etc/mysql/conf.d/rivendell.cnf
# ssh root@192.168.1.22
# nano /etc/mysql/conf.d/rivendell.cnf
Change:
server-id=2
log-bin=mysql-binB
Now save and quit then exit ssh back to the main server
# exit
NB: At this point you will need to create a Rivendell database and import a backup of your DB (or install Rivendell from scratch and run rdadmin to create a new DB). This needs to happen on both servers!
Again on both servers restart mysql:
# service mysql restart
If there are any errors check your rivendell.cnf file.
Getting audio synchronisation working
On both servers we need to add a few system users and then add this info to the Rivendell database. We'll add rduser but won't give it the ability to login (the -M)
# useradd -M rduser
# addgroup rivendell
# adduser rduser rivendell
Next up we need to create /var/snd and set the appropriate permissions:
# mkdir -p /var/snd
# chown rduser:rivendell /var/snd
Rsyncd
Rsyncd is a daemon version of rsync that is used by aman to keep the synchronisation of /var/snd up to date.
We use aman to designate which is the master server and rsync overwrites the slave with the info from the master. First we need to enable rsyncd and tell it what directory we'll be syncing.
There is a config sample in ~/aman/conf/rsyncd-sample.conf that we will use to do this. On both servers:
# cp ~/aman/conf/rsyncd-sample.conf /etc/rsyncd.conf
# nano /etc/default/rsync
Change the line RSYNC_ENABLE=false to RSYNC_ENABLE=true
# service rsync start
Xinetd
Xinetd is meant to be a way for things to start/stop daemons as required. For us this should mean that rsync is only turned on when aman needs to use it and is otherwise off (I'm not sure whether the way I've set up rsync above effectively means this is not needed).
Again there is a xinetd config file we can use. On both servers again:
# cp ~/aman/conf/rsyncd.xinetd-sample /etc/xinetd.d/rsync
# nano /etc/xinetd.d/rsync
Change flags = IPv6 to IPv4 (unless you use IPv6)
Now all we need to do is start the rsync daemon and set up the mysql replication users.
# service rsync start
Adding the MySQL replication users
Once again we have some helpful scripts we can use. Most of the settings here are the defaults, all you will have to do is type in your MySQL root password (that you noted down earlier). So lets add the rivendell database users and then the replication users:
# ~/aman/scripts/aman_add_rivendell_user.pl
MySQL Admin User [root]: *hit enter*
MySQL Admin Password: your_root_password_goes_here
Rivendell User [rduser]: *hit enter*
Rivendell Password [letmein]: *hit enter*
Host to Add [%]: *hit enter*
Obviously change any users/passwords as needed.
# ~/aman/scripts/aman_add_replication_users.pl
MySQL Admin User [root]: *hit enter*
MySQL Admin Password: your_root_password_goes_here
Replication User [repl]: *hit enter*
Replication Password [letmein]: *hit enter*
System A Public Address [192.168.1.21]: *hit enter*
System A Private Address [192.168.10.21]: *hit enter*
System B Public Address [192.168.1.22]: *hit enter*
System B Private Address [192.168.10.22]: *hit enter*
Starting the Aman service
We're basically done. All you need to do is start the amand service and then load the aman gui tool to set everything up:
# service amand start
If you get an error saying libaman.so is not found, reboot and it should be fine.
But I don't have a GUI this is a server
As far as I can tell the aman gui should work from any machine as long as the /etc/aman.conf file is present and correct, however you can get an on demand GUI going on the server quite easily (if you then use X Forwarding you don't even have to sit in front of the thing to do it).
We'll be installing lxde-core to keep things light weight:
# apt-get install x-window-system lxde-core
Once that lot is installed simply run startx and you'll get your GUI.
# startx
Once in there open a terminal and run aman
# aman
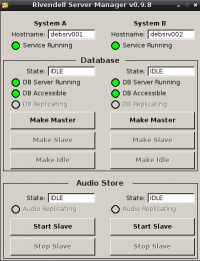
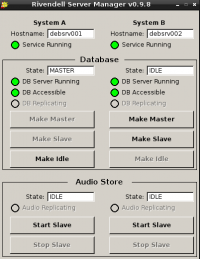
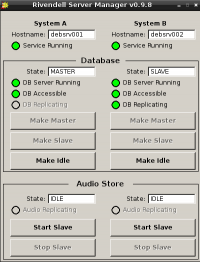
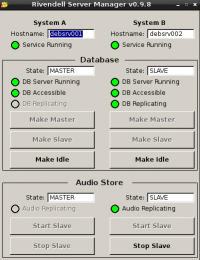
We'll assume SystemA will be the master, to do this click Make Master under the Database Section, then Make slave for System B.
When this is working hit start Slave for System B and everything should be working.
You can check /var/log/syslog for any error messages. If there are permission issues its usually the ssh-copy-id's not having been completed. If you've tried to be clever and use sudo users instead of root you'll also get permission errors here.


